Want to add some whimsy and playfulness to your Christmas decor? Make this Whoville Christmas tree! It’s simpler than you think, and everyone will admire your unique decor. Here’s how to make a Grinch tree for Christmas.
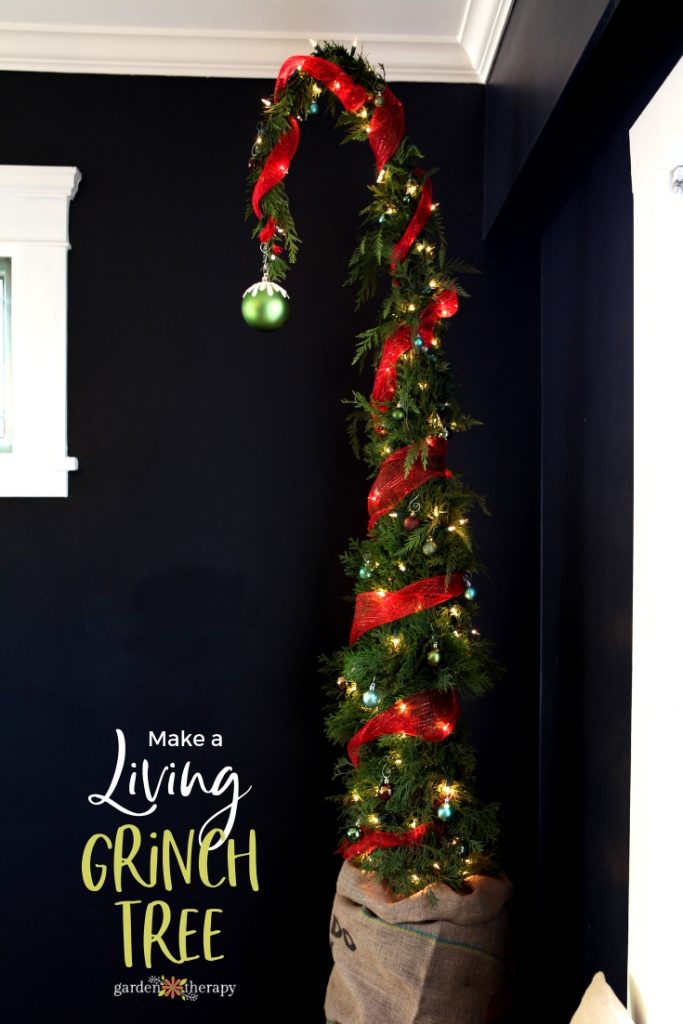
There are many versions of the Dr. Seuss-inspired Grinch tree, from Whoville-esque trees adorned with candy-coloured ornaments to snow-covered, oddly-shaped trees that set the scene outdoors.
Perhaps the most iconic is a tall, skinny evergreen wound up with wire and a heavy ornament dangling from the curved-over top. These represent the trees that Mr. Grinch robbed of ornaments and then shut like an umbrella before tossing in his giant sack.
Quirky looking and cartoonish, a Whoville Christmas tree’s message is that Christmas isn’t about presents, or ornaments, or trees, or even roast beast.
“Maybe Christmas, he thought… doesn’t come from a store. Maybe Christmas, perhaps… means a little bit more.”
Let’s embrace the true spirit of the Grinch!
Add Cheer With a Whoville Christmas Tree
It was Christmas 2011 when I was feeling a little blue during the holidays, and I wasn’t in the mood to celebrate much. By some magic, a Grinch tree entered my life, and Christmas was saved!
You can read all about the Magic of the Grinch tree here. Bonus: you will get to see how much my old dog Meatball resembles the Grinch.
After I published that post, I proceeded to field what seemed like endless emails from people ALL OVER THE WORLD trying to order the Grinch-inspired Christmas tree. I was blown away!
I emailed everyone back to say that I had described in the post how I made it, but they just wanted me to make them one, or fifteen, and in, like, the next two days, and then ship it across the continent.
Good grief!
I considered making them (for a minute), but since I’m more about “teaching someone to fish” than “fishing for them” I planned to write a tutorial on how to make a Grinch tree.
A Simple DIY Project
That is really the whole point of everything I do here on Garden Therapy: showing how to make some fun garden (or garden-inspired) project that gets people jazzed enough to give it a try. I hope they just may catch the gardening bug, get outside, have fun, and sing the praises of gardening to all, just like those little Whoville kids. I have big dreams.
Anyway, I politely told folks how to make the Grinch-inspired Christmas tree and the ones who made them sent the praises of a) how much fun it was, b) how easy it was, and c) how everyone loved their unique tree. Want to learn how to make one, too? I’ve got you covered!
How to Make a Grinch Tree
Today, I will break down the whole thing, step-by-step. Even better, you won’t be making a regular old Grinch tree. Nope, today you will learn to make one that is nine feet tall!
By the way, if you don’t have the space or just want something a bit smaller, I recommend you check out my post on how to make a tabletop Grinch tree. It’s the perfect way to pack all that holiday whimsy into a tiny package. 😉
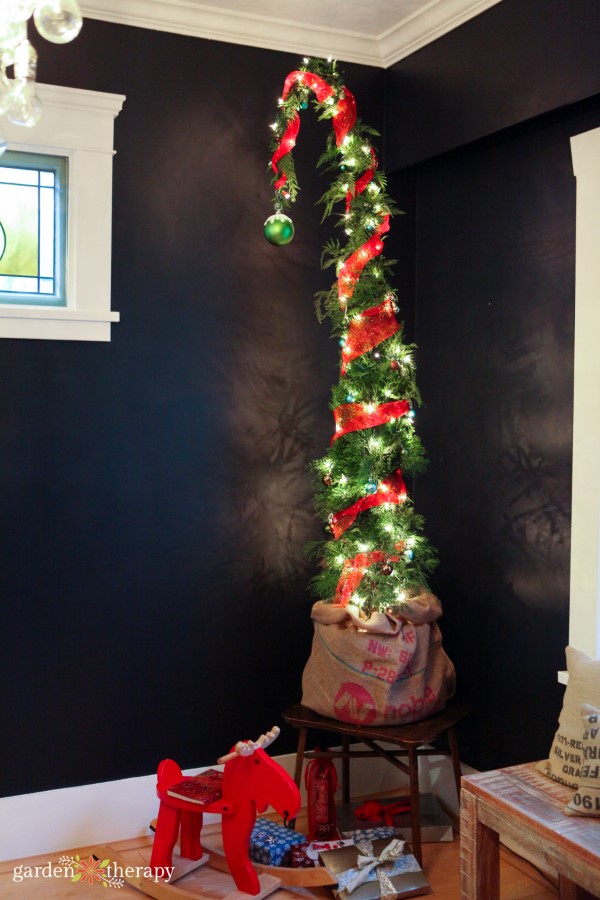
For this particular tutorial, however, we are going large! Let’s talk about how to build an impressive 9-foot-tall Whoville Christmas tree!
Materials
Make It!
Choose a full cedar shrub that is healthy, stands upright, and is symmetrical. I used a 5′ cedar hedge because that was what was available during the winter months.
If you think ahead and grab one when there are plenty of nurseries open that are full of 8′ hedges, you will have an easier time fashioning it into a Grinch tree.
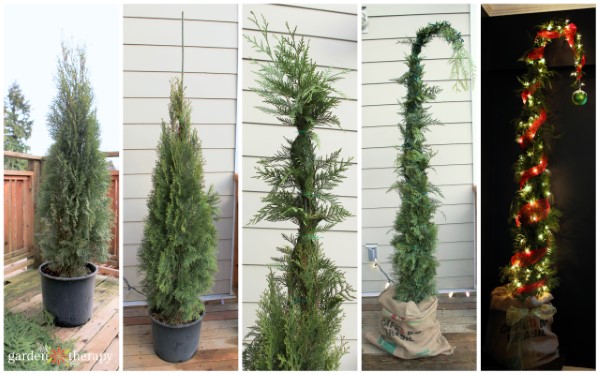
Use the wire to attach the green plant stake to one or more strong stems in the center of the hedge. You want the stake to add an extra 3′ in height. (The remaining foot will be the branches that hang over the top.)
Begin adding boughs of cedar to build up the tree at the top, covering the plant stake. Begin with the cedar branches starting from below the stake with the leaves facing upwards, and layer more and more onto the stake to fill in branches all the way up to the top.
Continue adding branches and securing them with the garden wire until you have the rough shape that you want, with at least a foot of cedar draping from the very top of the plant stake. Reserve a few branches for filling in spots once you have bound the hedge.
If the tree is unstable at all, use 1-2 more stakes inserted in the center of the plant and use wire to attach it.
Now, when you have the height and fullness you want, you can begin wrapping the lights around the tree. Start at the bottom and wind miniature white lights around the tree fairly snugly, tucking in floppy branches as you go.
The final look should be a bound, skinny, evergreen tree with a floppy top.
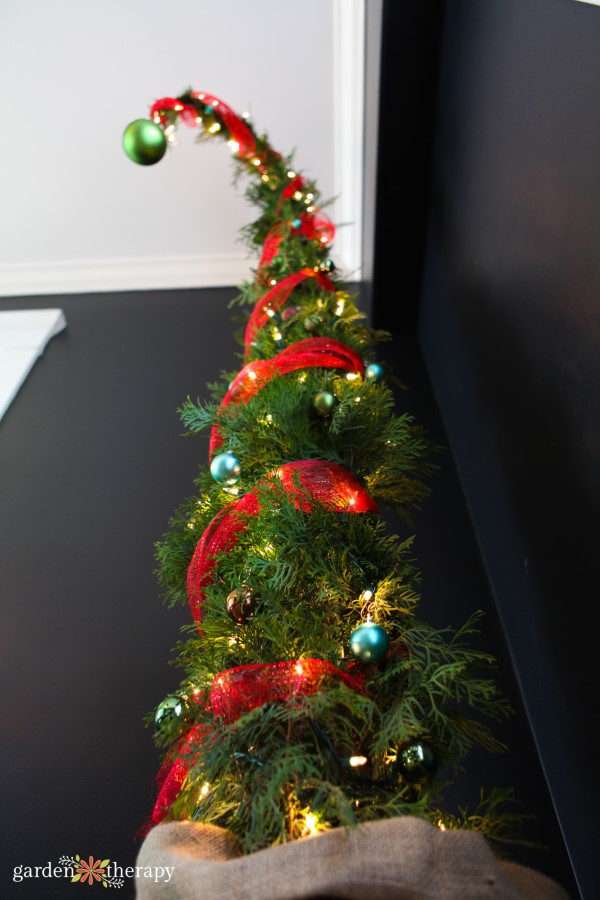
Decorate the Grinch Tree
Place the pot on the plant tray and set the whole thing into the burlap sack. Use ribbon to tie the sack at the top.
Wind decor mesh around the tree, then add a large but fairly light ornament to the very top of the tree.
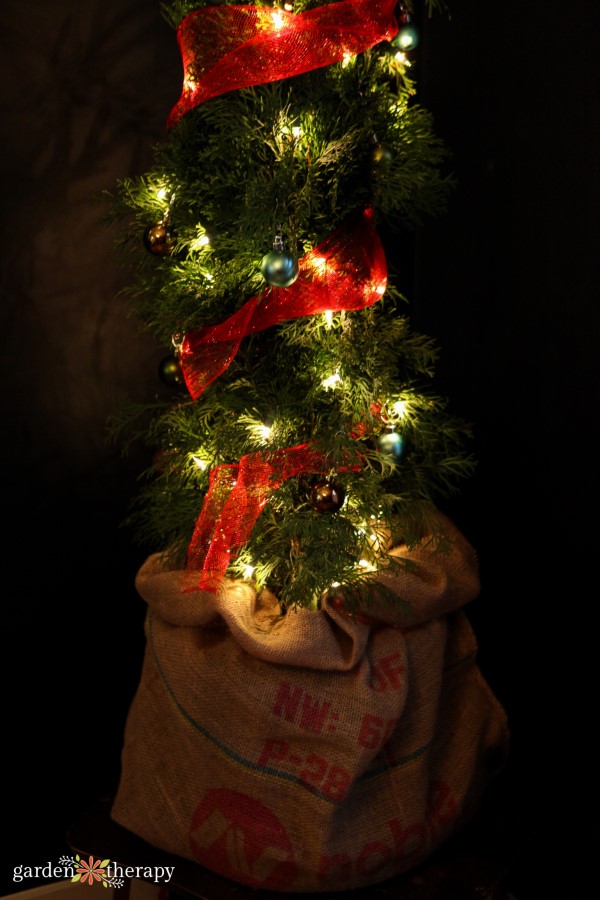
At this point, you can really personalize it. The tree is complete as it is, but you can add some of your favourite ornaments as well. I would recommend small ones so as not to overpower the skinny design.

Want a smaller version? Don’t forget to check out how this tabletop Grinch tree turned out!
Frequently Asked Questions About Grinch Trees
How do you turn a Christmas tree into a Grinch tree?
There are two key things you need to do to turn a tree into a Grinch inspired Christmas tree. The first, you need to wrap it with wire to tighten and gather the branches together so they’re all facing upward. You may need to add some extra boughs to bulken it up.
The other key part of a Grinch tree is it’s curved top. The tree should naturally flop with the weight of the topper ornament, but you can also help curve it with the wire.
What colours go on a Grinch tree?
The most common colours to decorate a Grinch tree are red. The top ornament and the ribbon around the tree should be red or green if you want to replicate the Whooville Christmas tree, as well as a burlap sack at the bottom. But decorate it however you want!
More Christmas Ideas:
DIY Grinch Tree {How to Make a Whoville Christmas Tree}
This 9-foot tall Grinch tree is sure to add whimsey and fun to your Christmas decor this year.
- Place your pot into the burlap sack and tie it with ribbon.
- Use the wire to attach the green plant stake to one or more strong stems in the center of the hedge. You want to add the extra height to the tree to make it 9-feet tall. The amount you need to add depends on how tall your tree is.
- Begin adding boughs of cedar to build up the tree at the top. Make sure to cover the plant stake. Begin with the cedar branches starting from below the stake with the leaves facing upwards, and layer more and more onto the stake to fill in branches all the way up to the top.
- Continue adding branches secured with the garden wire until you have the rough shape that you want. To get that classic Whoville Christmas tree look, make sure to leave at least a foot of cedar draping from the very top of the plant stake.
- Fill in any areas that look sparse with more branches if necessary.
- Wrap lights around the tree, starting at the bottom. Make sure to tuck them into the greenery.
- Next, wrap the deco mesh ribbon around the tree. Red will be the most classic color to use.
- Add a large ornament to the top of the tree, then smaller ones within the branches if you like.


